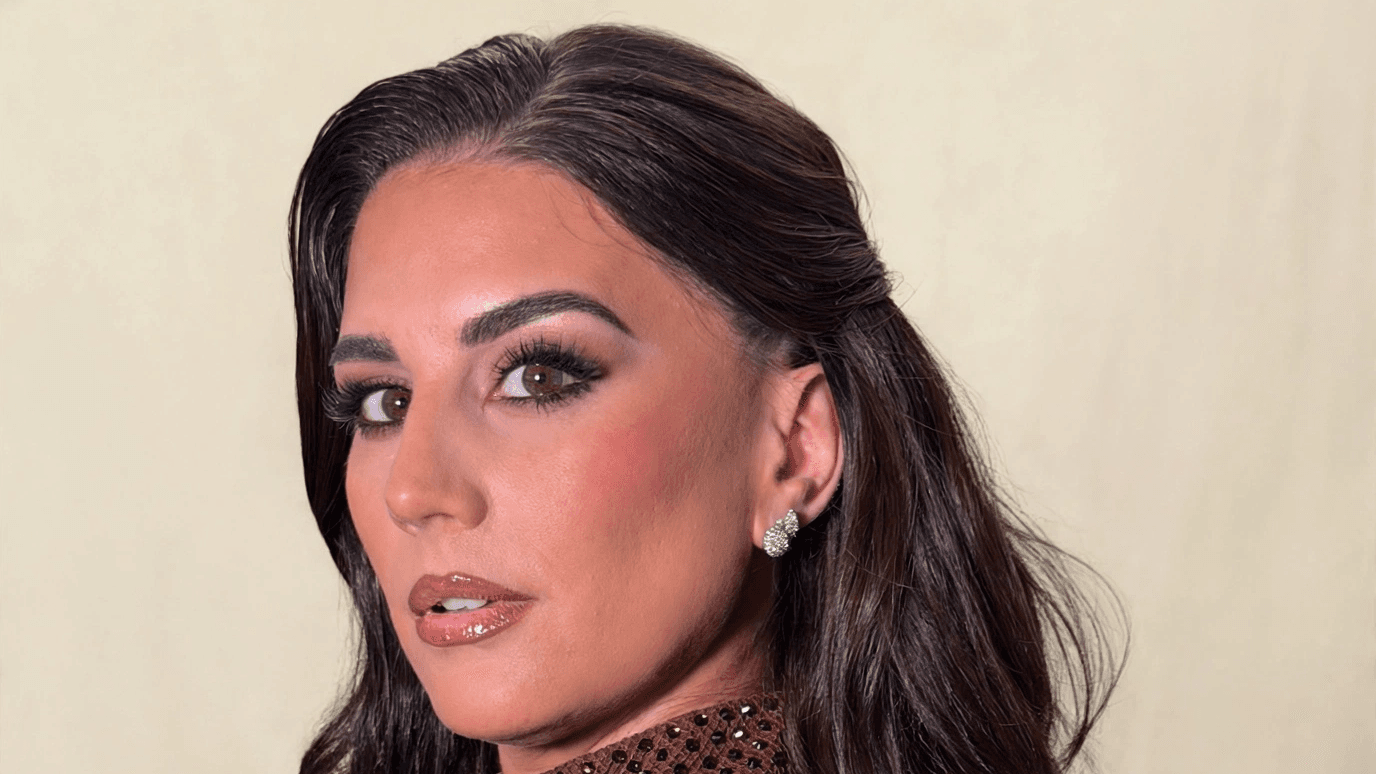
SULTRY SMOKEY EVENING GLAM
$97
You know how to apply makeup.
Now learn to see what needs adjusting.
You finish blending, but the smoke has lost its shape.
You add depth at the outer corner, but the eye still looks heavy.
You build up the lashes, then realize they’re hiding the work underneath.
The same thing can happen with skin.
The foundation looks smooth and the contour is blended, yet the face still feels flat.
You know something needs adjusting.
The harder part is knowing exactly where.
In this class, I explain those decisions as I make them.
You’ll see where I add darkness, where I bring back light, when I change brushes, and why I return to a step that looked finished a few minutes earlier.
That is how you begin developing the eye to assess your own work and make a deliberate correction.
The brief: open the eyes, elongate the shape, and build dimension throughout the face.
Hannah wanted her brows to move outward and her eyes to look more open.
That shaped the entire application.
I worked on the arch and tail of the brow, built the smoke around the outer eye, and placed the lashes to support an elongated shape. Through the complexion, I balanced warmth with a bright center so the face kept its structure.
You’ll follow those choices as the look develops, including the small refinements that bring it together.
Inside the class:
See how I assess Hannah’s brows, build the arch and tail, and work toward balance between the two sides.
I explain how I combine pencil, tinted gel, and powder to create fullness and dimension while keeping the finish hair-like. You’ll also see how I refine the edges and revisit the brows as the rest of the face develops.
Learn to see how brow direction, thickness, and placement affect the space around the eyes.
Build smoke with depth, shape, and softened edges.
Follow how I layer pencils, cream shadow, and powders to build the eye gradually.
I explain why I develop the browns before adding black, why I concentrate intensity at the outer corner.
You’ll see the back-and-forth between applying and blending, including when I add depth back after softening an edge.
Pay attention to the brush, pressure, and direction of each movement so you can understand what keeps the smoke in place.
Depth is only part of the shape.
You’ll also see where I introduce lighter shades throughout.
Study how the lighter areas work alongside the smoke. This is where you begin seeing the eye as a balance of light and depth, with each area contributing to the shape.
Build lashes around the eye, one placement at a time.
Watch how I combine multiple lash types to create a wispy lash with lift and elongation.
I explain why I preserve space between lashes and keep checking the placement and how length, density, and position change the effect.
You’ll also learn my well known drop-down lash technique.
The goal is to understand what each lash is contributing before adding another.
You’ll see how I prepare and add color to the neck and ears before matching the face.
This gives you a view of the complexion decisions that happen before concealer and contour: the surface you’re working on, the color you’re matching, and how the face relates to the exposed skin around it.
See where I place brightness through the center of Hannah’s face and how I balance it with contour.
I explain why I add light back when the complexion becomes warm, and how those lighter areas help bring the structure of the face forward.
You’ll see the effect of each addition before everything is blended together.
Blend while preserving the placement.
A brush and a sponge can move product differently.
In this application, I explain when I want to move product and when I want to press it into place.
Watch how I alternate tools, use smaller brushes for precise areas, and clean up around the smoky eye without disturbing its shape.
This is a chance to study the purpose behind the movement, so you can make more intentional choices about how you blend.
Set the makeup while keeping its dimension.
Follow where I apply powder, where I preserve radiance, and how I finish with blush and bronzer.
I explain why I keep the center of this complexion matte while allowing the cheekbones to catch the light. You’ll see how the finish itself helps direct attention across the face.
Train your eye to see what the look needs next.
Throughout the class, I explain the four things I’m considering:
Pressure. Precision. Product. Placement.
You’ll see those principles applied to the brows, eyes, lashes, and complexion, with explanations of how a small adjustment changes the result.
Learn to recognize when blending has softened the shape too far, when the center of the face needs brightness, or when another lash would crowd the eye.
As you study and practice these decisions, you can begin approaching your own work with a clearer understanding of what to adjust and why.
WHAT'S INCLUDED:
1) Instant access to the recorded class
Start learning as soon as you join. Watch the application with my voiceover explaining the products, tools, layering, and placement decisions throughout Hannah’s look.
2) A PDF of every product used and linked
3) A brief synopsis of the techniques, frameworks, and steps that Goldie used to achieve this look
4) A $97 credit toward any Pro Beauty Academy Online Program that you join within the next 30 days.
Please email info@probeautyacademy.net to redeem.
What happens after the four-day launch?
The class price increases from $97 to $197.
Learn the look. Develop the eye behind it.
Watch how I build the shape, balance the light and depth, and refine the details throughout Hannah’s application.
Take those decisions into your practice so you can begin seeing your own work with greater precision.