TL;DR
Stan Store Order Bumps let you display an add-on offer at checkout—so customers can add it with one click before they even press purchase. To set one up, open a product, head to the Options tab, toggle Order Bumps on, choose the product you want to upsell, pick your design, and customize your headline, description, and call to action. Hit Publish, and your Order Bump is live—ready to increase your average order value every checkout.
Welcome to the Stan Store Success Series with Professor T! In this lesson, we’re breaking down one of the sneakiest revenue tools on the platform: Order Bumps.
By the end, you’ll know exactly what an Order Bump is, where to find it, and how to set one up so that every checkout becomes an opportunity to make more money—without any extra work on your end.
I’m Professor T 👋 Your Stan Store success coach here to help Creator-Entrepreneurs like you turn your audience into income.
In case you’re new here, Stan Store is the #1 link in bio store for Creators to sell digital products, courses, communities, and more right from your social account—no website necessary. We’ve helped Creators earn over $600M in revenue so far, and I’m determined to help you become one of them.
That’s why today, I’m breaking down a feature with an easy setup and big payoff.
We’ll cover:
💜 What Order Bumps are and why they work
💜 Where to find Order Bumps inside a specific product
💜 How to choose your upsell product and pick the right design
💜 How to write copy that makes your Order Bump as enticing as possible
💜 What the whole checkout experience looks like from your customer’s point of view
Prefer to watch and follow along? Check out the full lesson right here or get access to more tutorials inside Stan Store’s Success tab 👇
Let’s get into it.

Heads Up! Order Bumps are a Creator Pro feature. If you’re already on Creator Pro, let’s build. If you’re on the Creator plan, no problem. Stick with me and you’ll get a solid preview of what Order Bumps can do, so you can decide whether you’re ready to upgrade.
First, What’s an Order Bump?
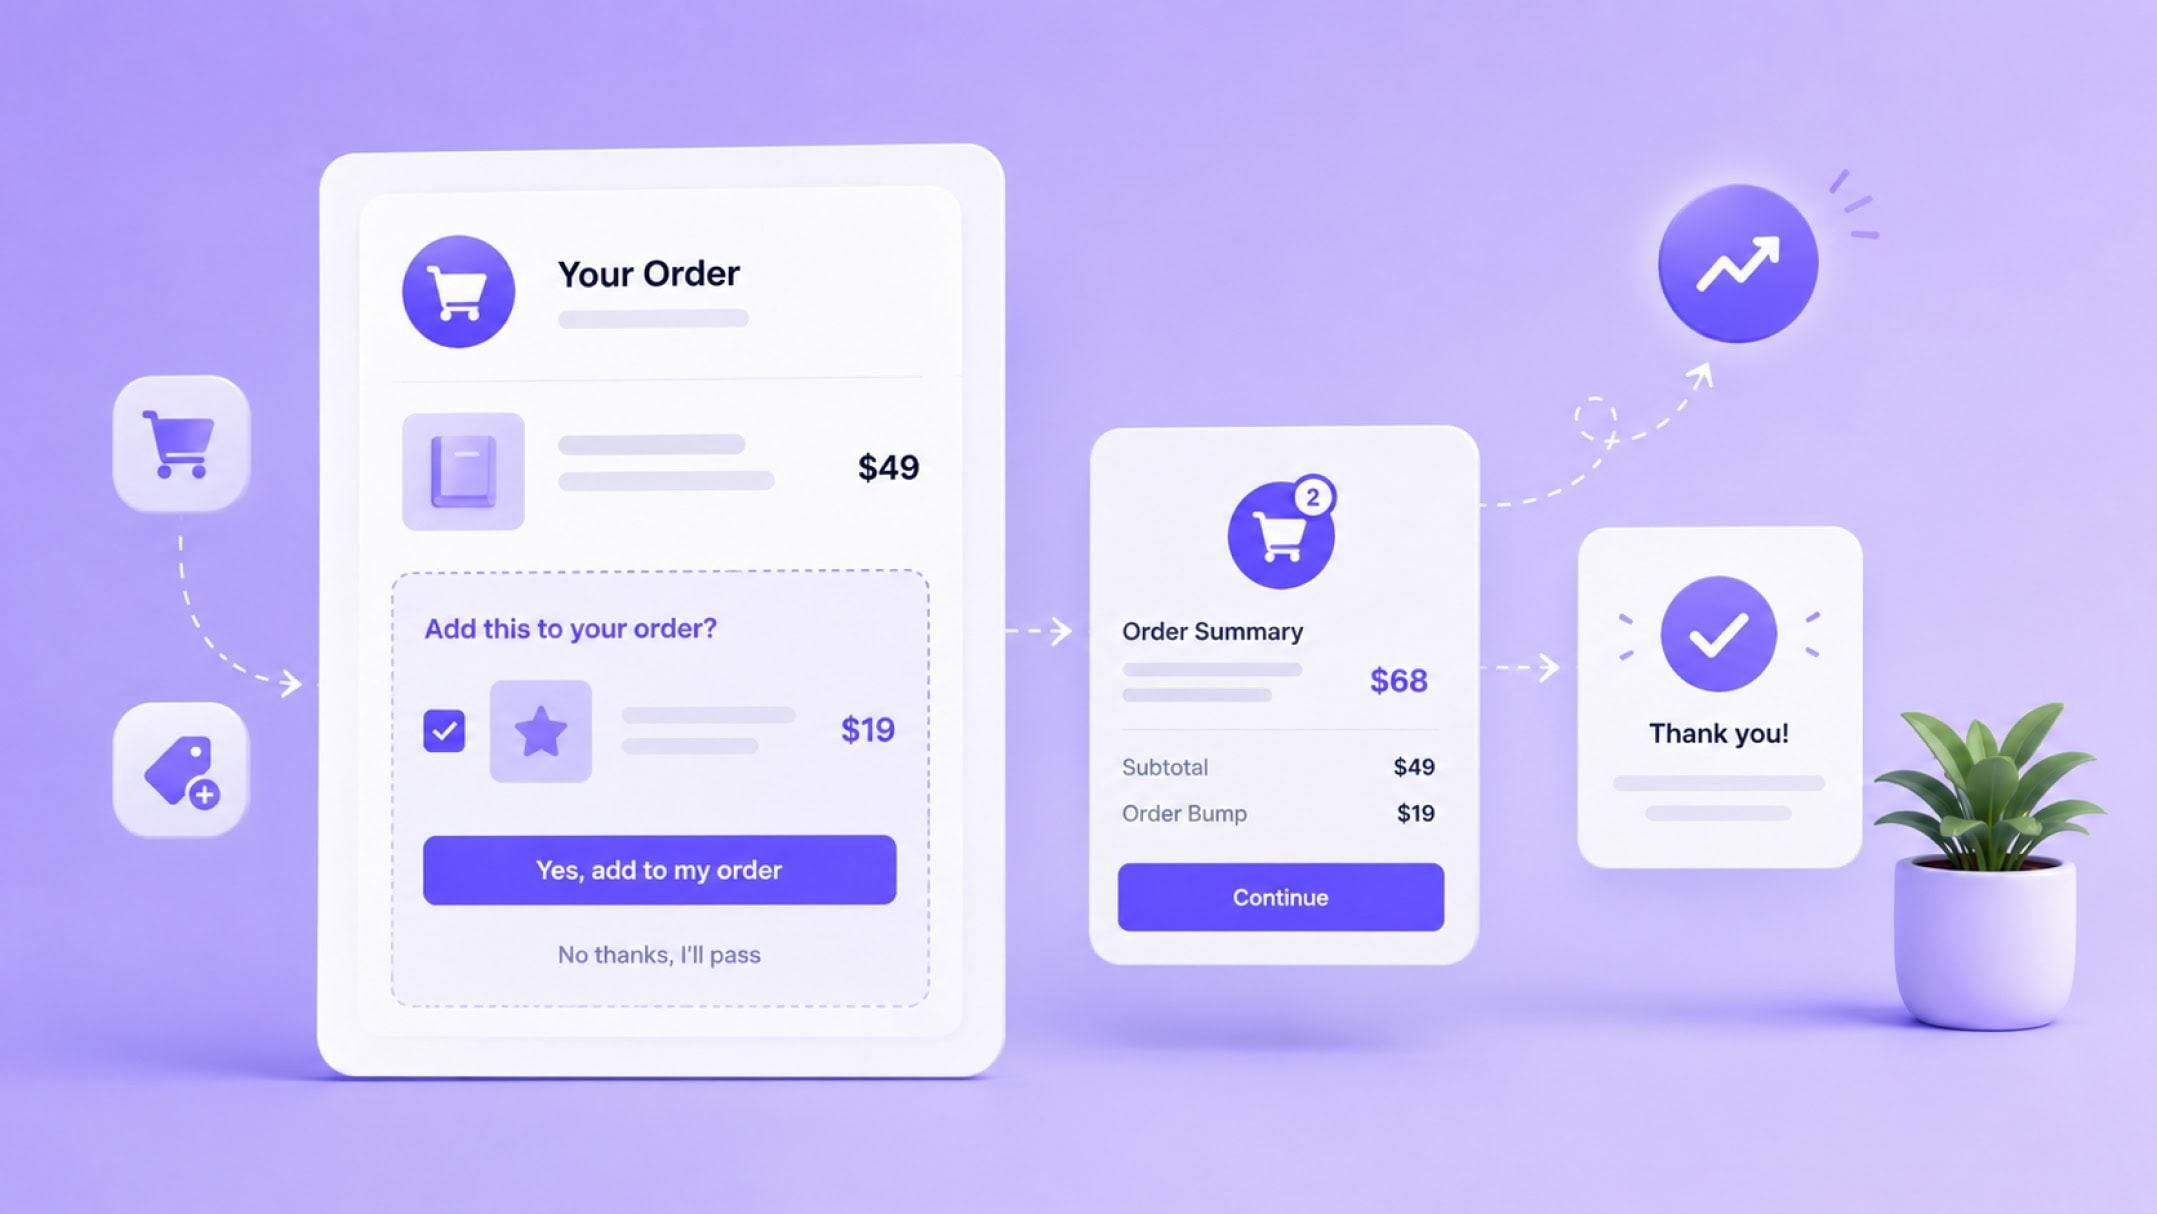
An Order Bump is a simple checkbox that lives at the bottom of a product’s checkout page. It surfaces one of your other products right when your customer is already in buying mode, so they can easily add it to their cart before they even hit purchase.
That’s it—One click. Two products. More money.
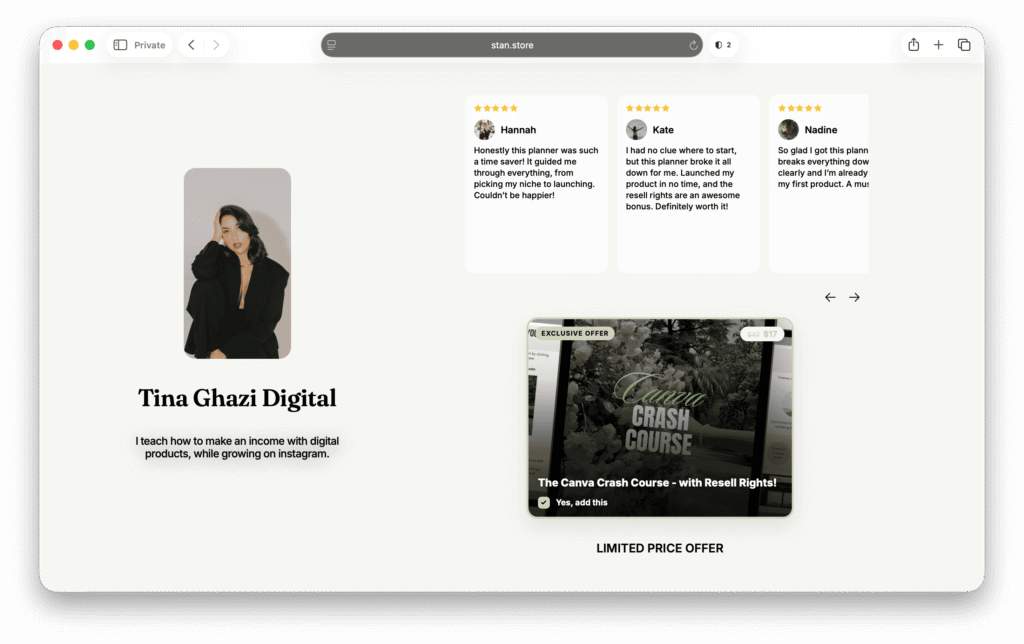
Unlike Funnels, Order Bumps don’t live within their own landing page in your Stan Store. They live inside individual products, which means the setup is fast and product-specific. And once it’s on, it runs on its own.
Here’s why this matters—when a customer lands on your checkout page, they’re already sold. They’ve decided to buy. That’s the highest-intent moment in your entire customer journey, and right now, most Creator-Entrepreneurs are letting it pass without offering anything else.
Order Bumps change that without adding friction, creating a separate sales page, or your customer having to go anywhere.
How to Set Up an Order Bump in Stan Store
Before we start, you’ll want to have at least two products already set up in your Stan Store—the product whose checkout page you’re adding the Order Bump to, and the product you want to upsell as an Order Bump.
Alright—let’s build.
Heads Up! Order Bumps work with digital downloads, courses, and communities. If you’re not seeing a product show up in the Order Bump dropdown menu, that’s likely why.
Step 1: Toggle Order Bumps On
Head into any product you want to add an Order Bump to. Click into it, then navigate to the Options tab.

You’ll see a list of features you can toggle on and off. The third one from the top is Order Bumps. Toggle it on to enable it.
Step 2: Choose Your Upsell Product
Right below the toggle, you’ll see a dropdown that shows whichever product auto-populates first in your Stan Store. That’s just a default—you can choose which product you’d like to include.
Click on the dropdown menu, and you’ll see every eligible product in your Stan Store listed there. Pick the one that makes the most sense as an upsell for the product this checkout page belongs to.
Once you select it, the preview will update in real time so you can see exactly how it’ll look on your checkout page.
Pro Tip: Pair products that naturally go together. If your main product is a digital download—like a quick-start guide, a template pack, a mini workshop—your Order Bump should be the logical next step. A community where your customers can join, meet others, and apply what they just learned. A course that goes deeper. The more relevant the pairing, the higher the conversions.
Step 3: Pick Your Order Bump Design
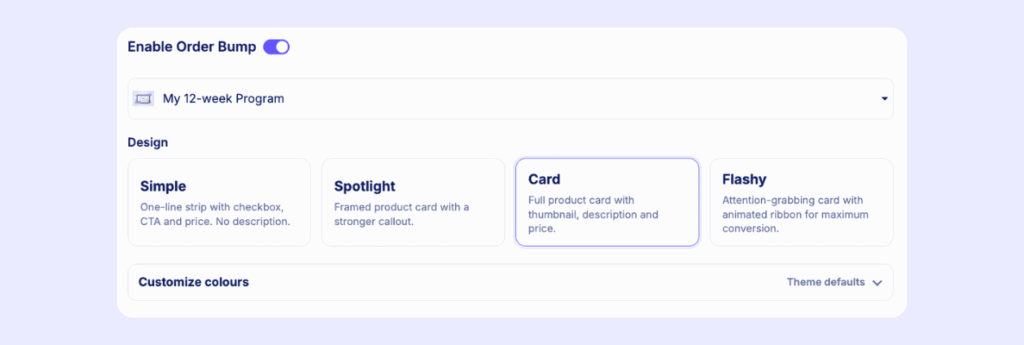
Here comes the fun part. Stan gives you four design options for how your Order Bump looks on the checkout page: Simple, Spotlight, Card, and Flashy.
Simple is clean and subtle—it doesn’t compete with the main checkout experience.
Spotlight gives you more visual space to work with.
Card leans into the product image and can really pop depending on your photo.
Flashy is exactly what it sounds like—bold, different, and hard to miss.

Cycle through all four and see what catches your eye. There’s no right answer here—it depends on your product image, your brand aesthetic, and how much you want the Order Bump to stand out on the page.
For our example, I’m locking in Card. The image looks great and the contrast really pops against the background.
Step 4: Write Your Headline, Description, and Call to Action
Now it’s time to tighten things up and make this Order Bump as enticing as possible.
You’ve got three copy fields to work with:
- Your headline. This shows up as an overlay on the product image in the top left corner. The default says “Exclusive Offer,” which isn’t bad, but you can do better. Make it specific to what you’re offering, like “Exclusive Deal,” “Add This Now,” “Members Only.” Whatever fits your product and feels on-brand for you.
- Your description. This is optional, but I’d recommend using it. A strong product image might speak for itself, but a one-liner that tells your customer exactly what they’re getting? That’s what pushes them from “maybe” to “yes, add this.”
- Your call to action. This is the small text that appears right next to the checkbox. Something like “Yes, add this” works well. Keep it short, affirmative, and action-forward.
Once all three are dialed in, scroll down and hit Publish. Your Order Bump is now live on that product’s checkout page!
That’s How You Turn One Sale Into Two
There you have it. You now know what Order Bumps are, where to find them, and exactly how to set one up—from enabling the toggle to publishing a checkout experience that works harder for you.
At this point, you should have a live Order Bump on at least one product in your Stan Store, converting that high-intent checkout moment into more revenue every time someone buys.
And remember: you don’t have to get every detail perfect on the first try. Pick a strong product pairing, customize your copy, and choose the design that feels right—then let it run. You can always come back and refine it as you learn what your audience responds to.
Want more simple tips to grow your Creator business faster? Stan’s Success tab has everything you need—with more lessons and tutorials from Professor T. Try it yourself with a 30-day free trial of Stan Store.
FAQ: Stan Store Order Bumps
Yes—Order Bumps are a Creator Pro feature. If you’re on the basic Creator plan, you can give Order Bumps a try with a 30-day free trial.
Order Bumps aren’t in the left-hand menu like Funnels. You’ll find them inside your digital download, course, and community products. Just click into the product you want to add an Order Bump to, go to the Options tab, and look for the Order Bump toggle button.
For now, you can Order Bump a digital download, a course, or a community. If a product isn’t showing up in the dropdown, it’s likely a product type that isn’t compatible with Order Bumps.
Yes, and that’s the best move! Because Order Bumps live inside individual products, you can set a unique upsell for each one—so the pairing always makes sense for wherever your customer is in their journey.
Head to your product’s checkout page to preview it from a customer’s point of view. You should see an Order Bump block at the bottom of the page with your custom design, headline, description, and call to action. You can also track revenue increases over time as more customers start opting in.